KDE 安装和配置

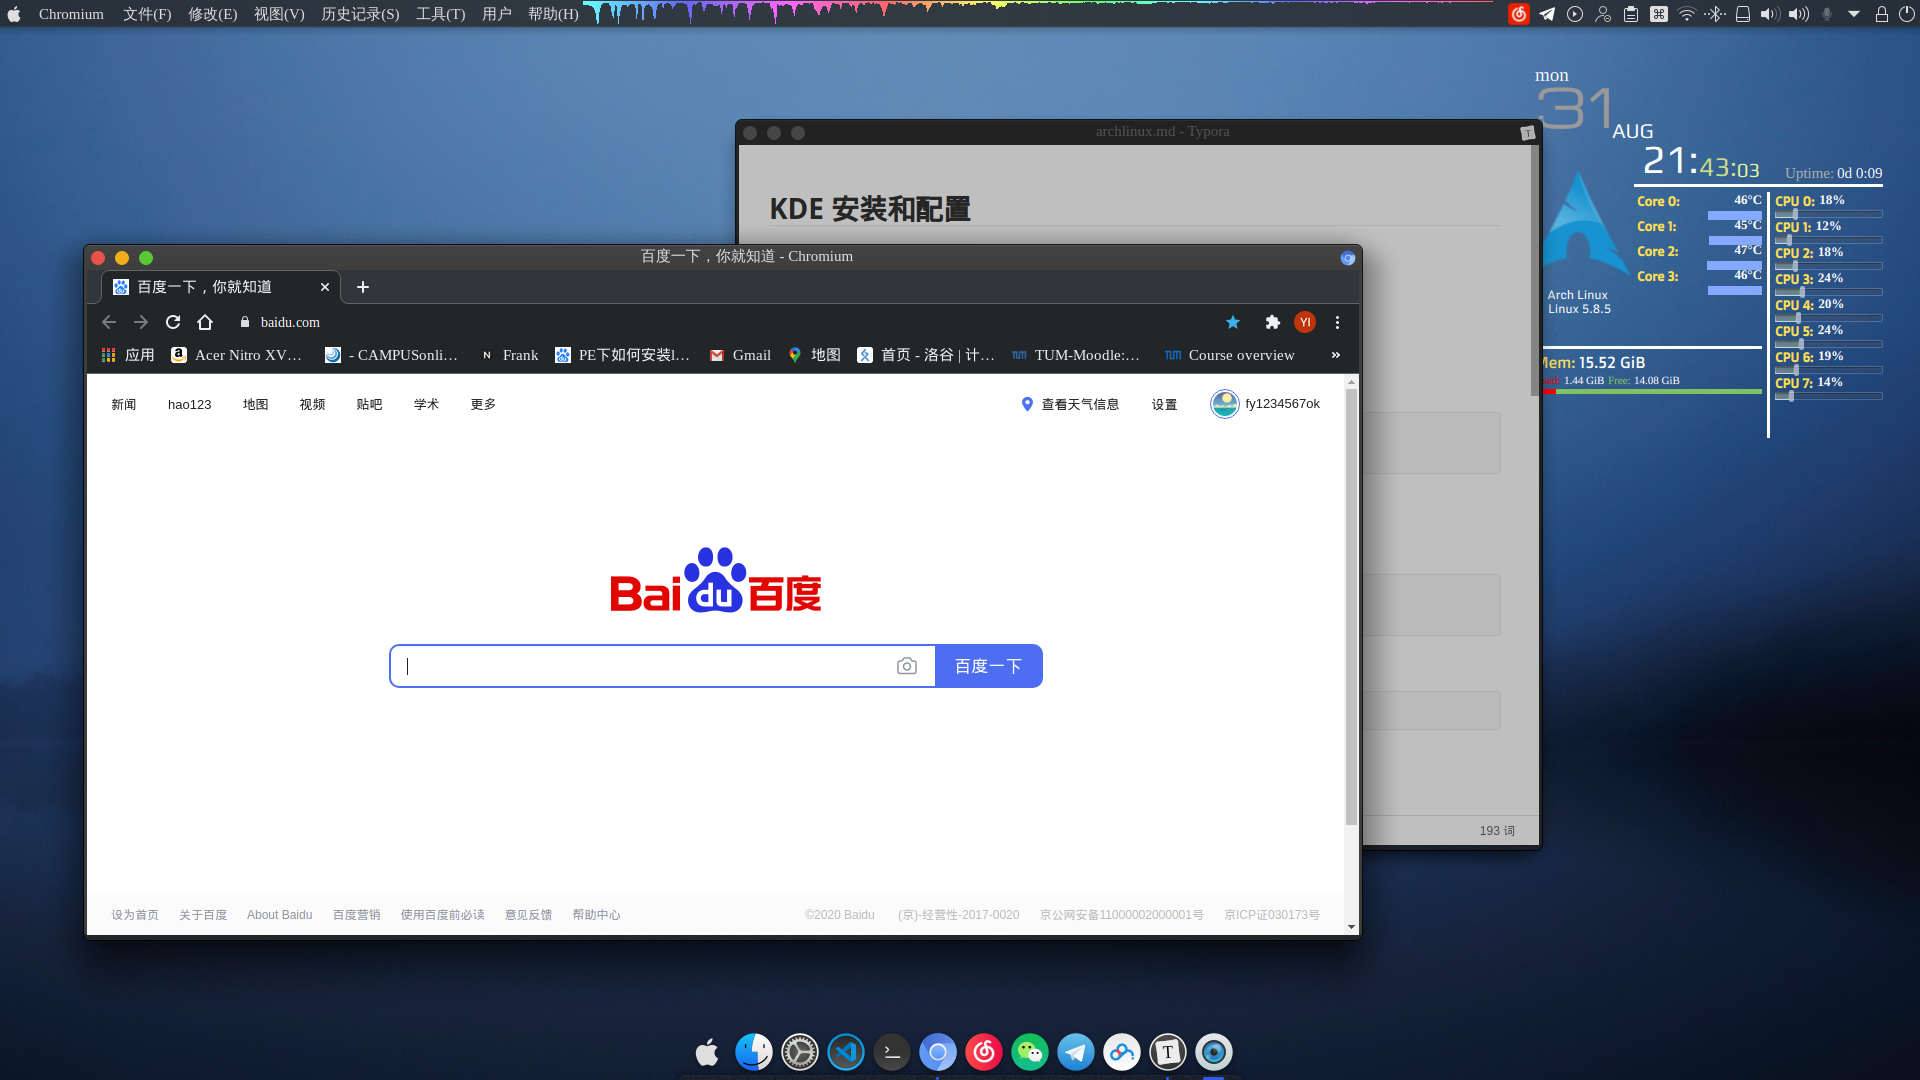
image-20200831214423806
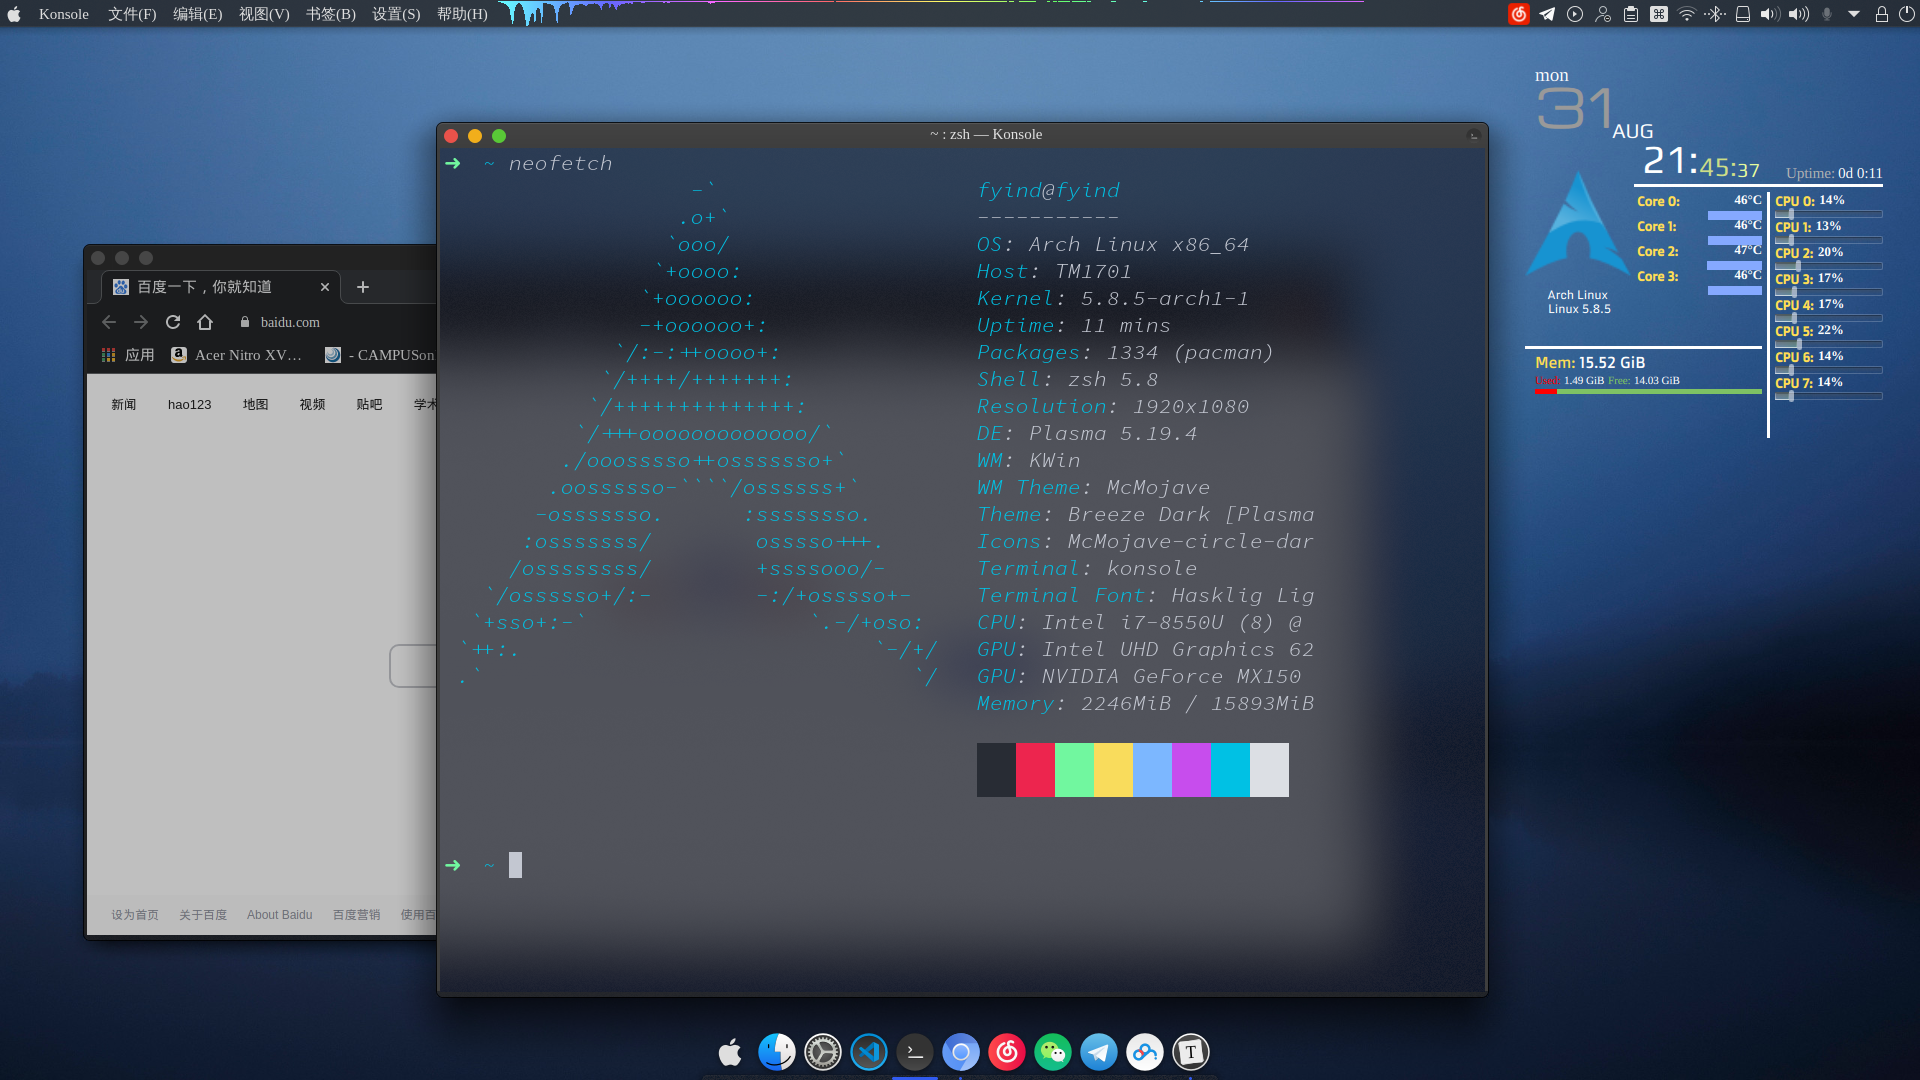
image-20200831214600617

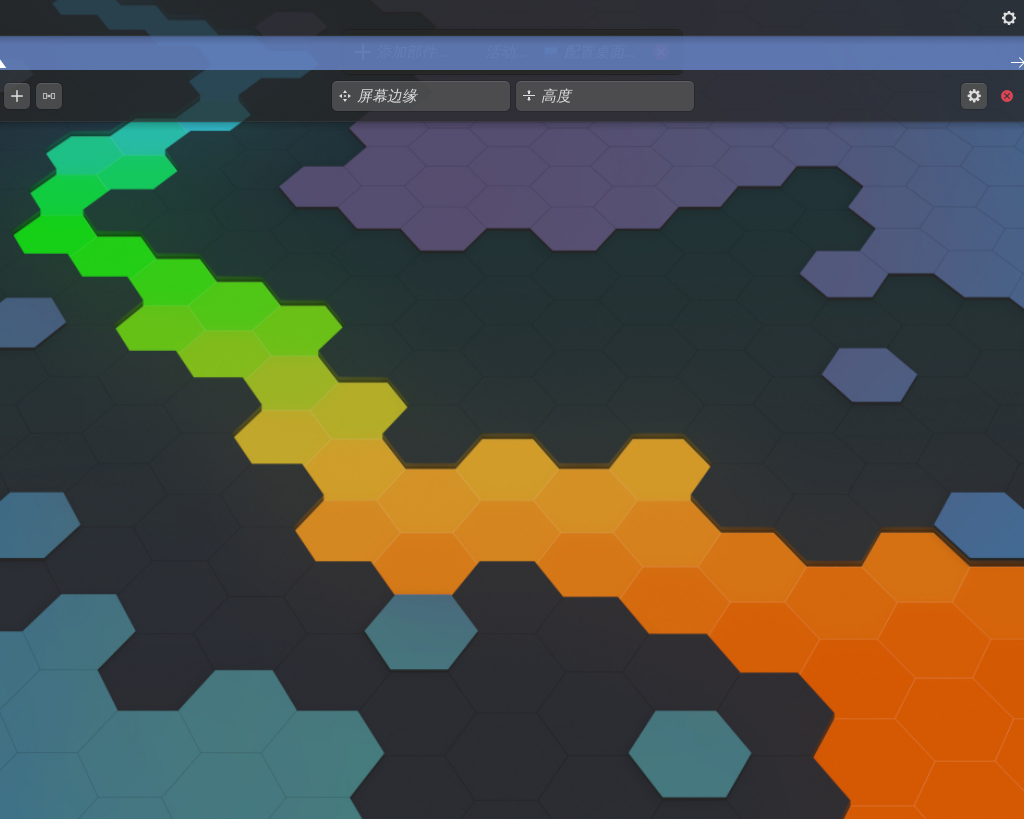
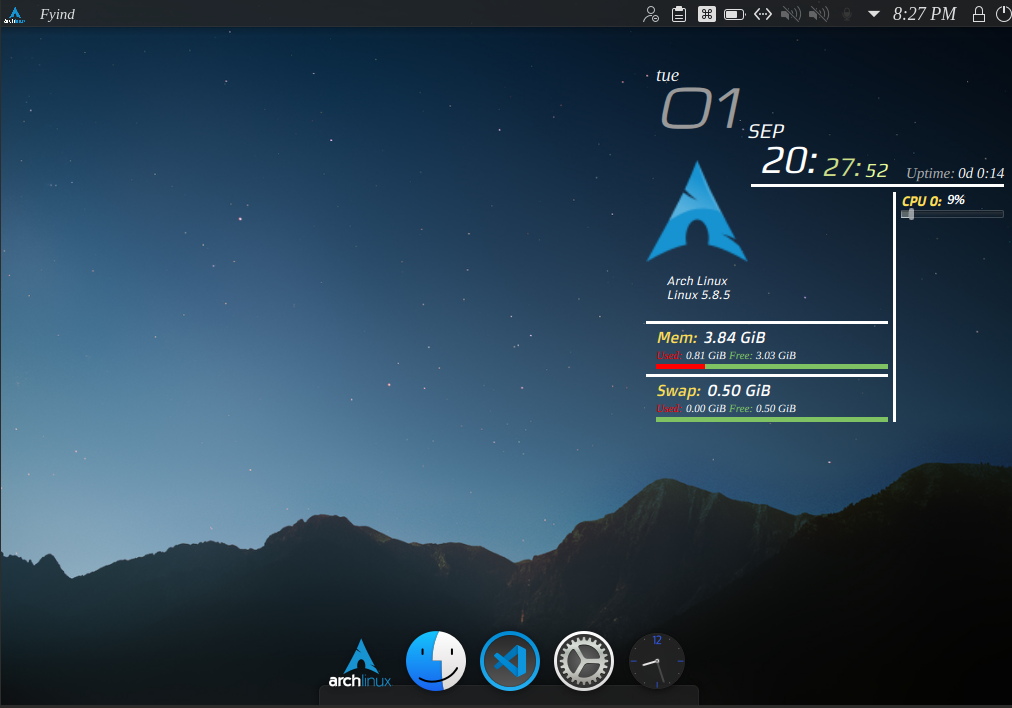
这个是效果图

基础安装

首先安装完 Archlinux . 参见 Archlinux 完整安装过程

首先连上网络

虚拟机或网线

1
dhcpcd

WiFi

1
2
3
systemctl start wpa_supplicant.service
nmcli dev wifi list
nmcli dev wifi connect "ssid" password "passwd"

创建交换文件

申请 512M 的空间

1
2
3
4
5
dd if=/dev/zero of=/swapfile bs=1M count=512 status=progress 
chmod 600 /swapfile
mkswap /swapfile
swapon /swapfile
vim /etc/fstab

然后在末尾添加

1
/swapfile none swap defaults 0 0

添加用户

这里的 [username] 换成你想要的用户名, 然后是设置密码

1
2
useradd -m -G wheel [username]
passwd [username]

配置sudo

1
2
3
pacman -S sudo 
ln -s /usr/bin/vim /usr/bin/vi
visudo

去掉其中 # %wheel ALL=(ALL)ALL 前面的 # 符号

然后切换用户

1
su [username]

安装KDE

配置源

1
sudo vim /etc/pacman.conf

[multilib] 和他下面的 Include = ... 的开头的 # 去掉. 在末尾加入

1
2
[archlinuxcn]
Server = https://repo.archlinuxcn.org/$arch

更新源,下载密钥

1
2
sudo pacman -Syy
sudo pacman -S archlinuxcn-keyring

显卡驱动

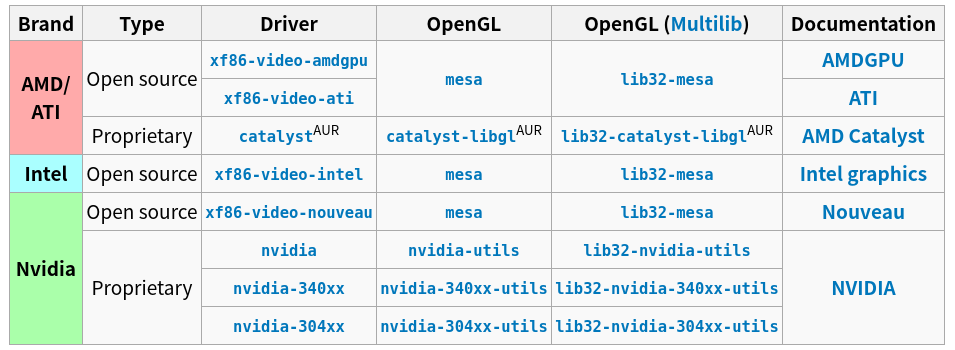
对照这个表安装你想要的驱动.

img
1
sudo pacman -S nvidia nvidia-utils lib32-nvidia-utils

安装KDE

1
sudo pacman -S xorg plasma kde-applications sddm network-manager-applet

启动服务,然后重启进入kde

1
2
3
sudo systemctl enable sddm
sudo systemctl disable netctl
sudo systemctl enable NetworkManager

安装中文字体

1
sudo pacman -S wqy-microhei wqy-microhei-lite wqy-bitmapfont wqy-zenhei ttf-arphic-ukai ttf-arphic-uming adobe-source-han-sans-cn-fonts adobe-source-han-serif-cn-fonts noto-fonts-cjk

安装 yay

1
2
3
4
sudo pacman -S git
git clone https://aur.archlinux.org/yay.git
cd yay
makepkg -si

把语言改成中文

1
sudo vim /etc/locale.conf

改成 LANG=zh_CN.UTF-8

然后退出,重启

1
2
exit
reboot

更改语言

从开始菜单找到 System Settings. 搜索 language 找到语言设置. 然后添加简体中文.
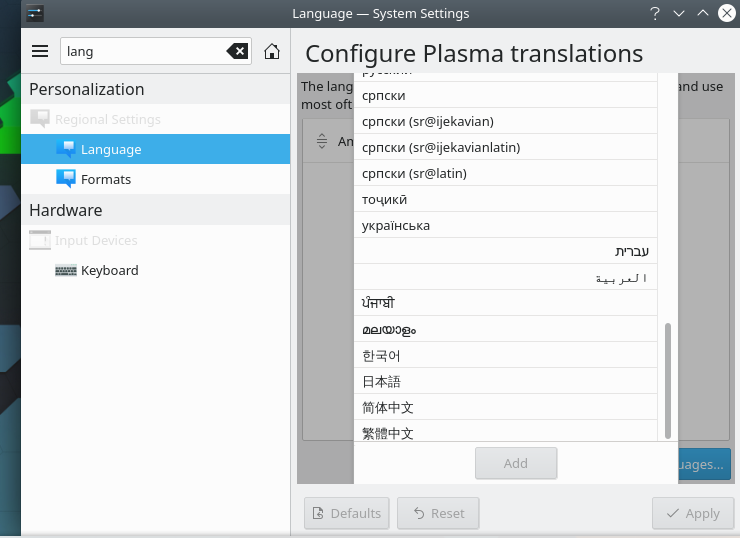
image-20200901104516102

然后把简体中文拖拽到第一个. 然后重启或者logout再进入就可以了设置成中文了.

安装中文输入法

1
2
sudo pacman -S fcitx fcitx-im fcitx-googlepinyin fcitx-configtool
sudo vim ~/.pam_environment

加入

1
2
3
GTK_IM_MODULE=fcitx
QT_IM_MODULE=fcitx
XMODIFIERS=@im=fcitx

安装蓝牙

1
2
3
4
5
sudo pacman -S bluez bluez-libs bluez-utils pulseaudio-bluetooth pavucontrol pulseaudio-alsa 
yay -S bluez-firmware --noconfirm
modinfo btusb
sudo systemctl enable bluetooth
sudo vim /etc/bluetooth/main.conf

设置 AutoEnable=true, ControllerMode=bredr

然后重启一下。

然后打开 fcitx-configtool 加入google Pinyin
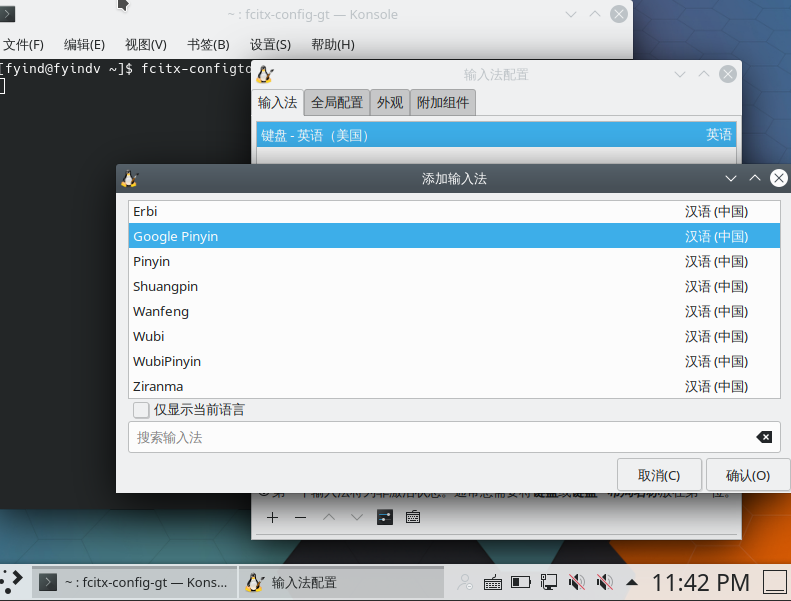
image-20200901110658814

然后就可以正常使用中文输入法了.

然后再安装一下必要的常用软件还有字体

1
sudo pacman -S zsh gcc jdk code typora chromium nerd-fonts-complete

虚拟机调整分辨率

如果你使用virtualbox 想更改分辨率,可以安装 virtualbox-guest-utils 这个包,然后再启动 vboxservice.service这个服务,然后重启即可.

1
2
sudo pacman -S virtualbox-guest-utils
sudo systemctl enable vboxservice.service

美化KDE界面

打开系统设置,全局主题里面选择 暗色微风 , Plasma样式里面点获取新的Plasma样式,搜索安装McMojave,然后选择McMojave
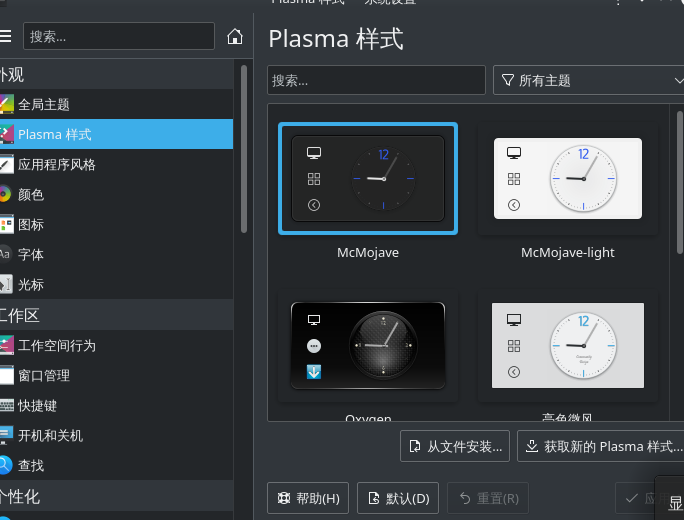
image-20200901111728258

应用程序风格安装 kvantum

先安装一下:

1
sudo pacman -S kvantum-qt5

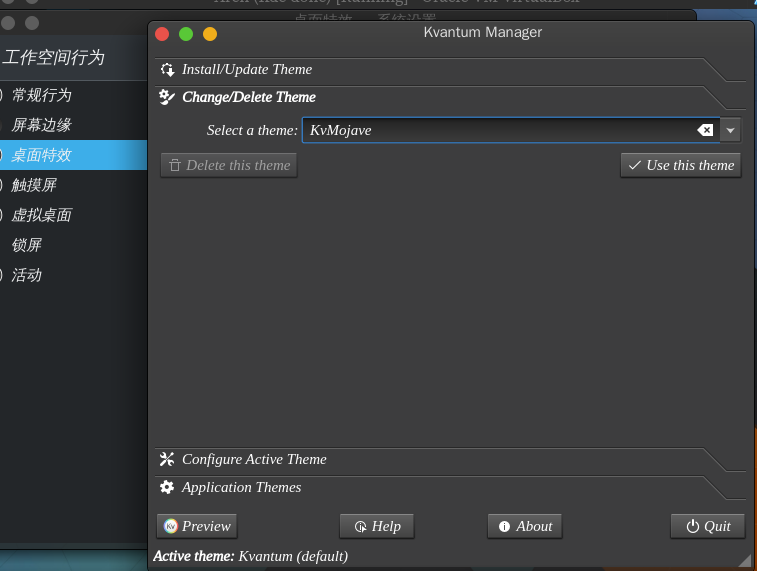
然后打开 Kvantum Manager, 改变主题为 KvMojave

image-20200901145507525

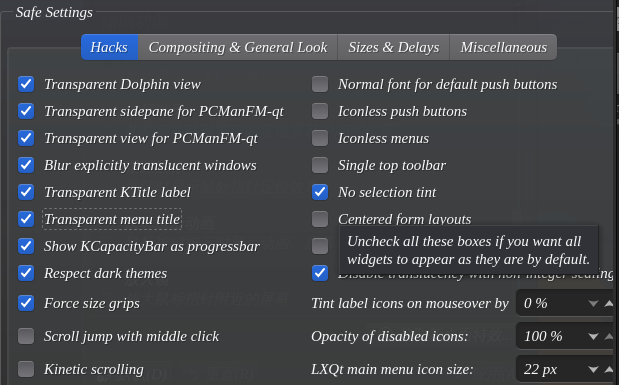
然后在 Configure Active Theme里面勾选

  • Transparent menu title
image-20200901145654770
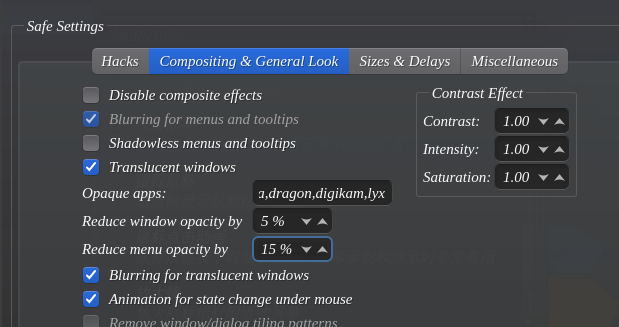
  • 在 Compositing 里面该一下opacity
image-20200901145727534

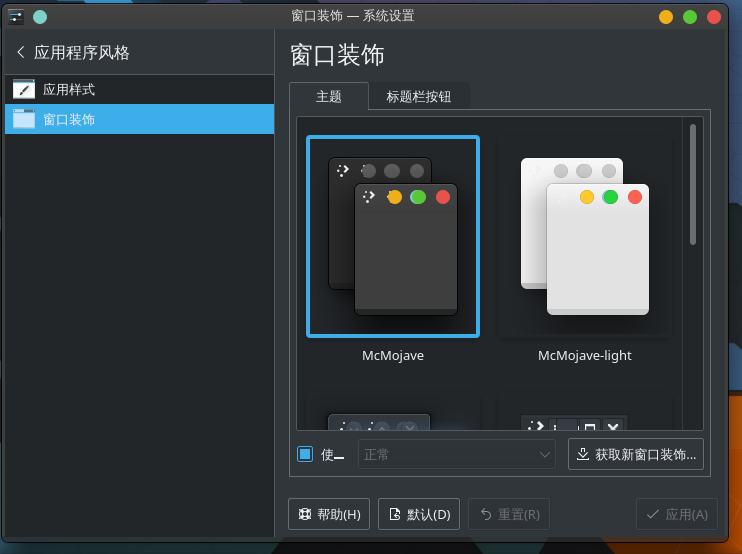
窗口装饰里面安装 McMojave

image-20200901114439788

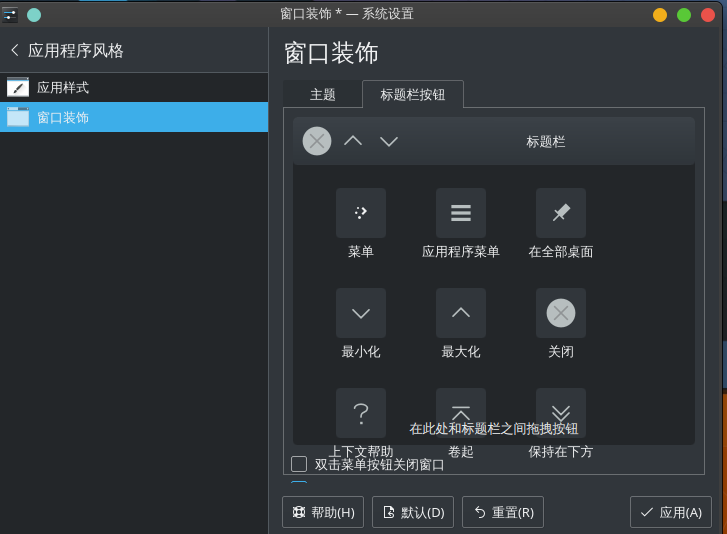
然后调整标题栏

image-20200901114603448

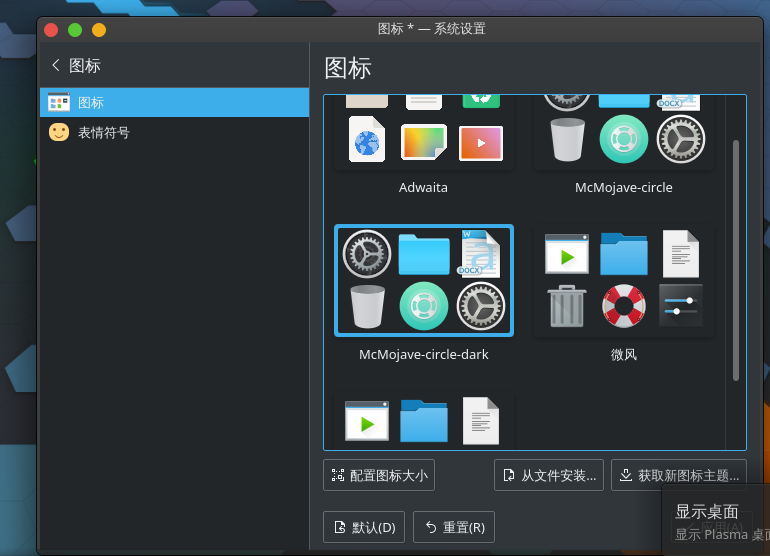
然后图标选择 McMojave-circle-dark

image-20200901135325907

我的字体是

常规,窗口标题: LiterationSerif Nerd Font

菜单:Source Han Serif CN

工具栏:VictorMono Nerd Font Italic

固定宽度: Hasklig Light Italic
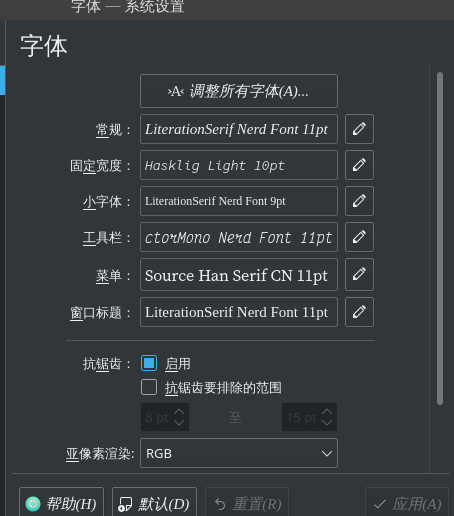
image-20200901140057721

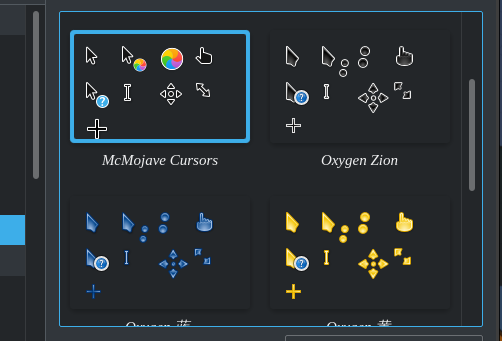
光标是 McMojave Cursors

image-20200901140255291

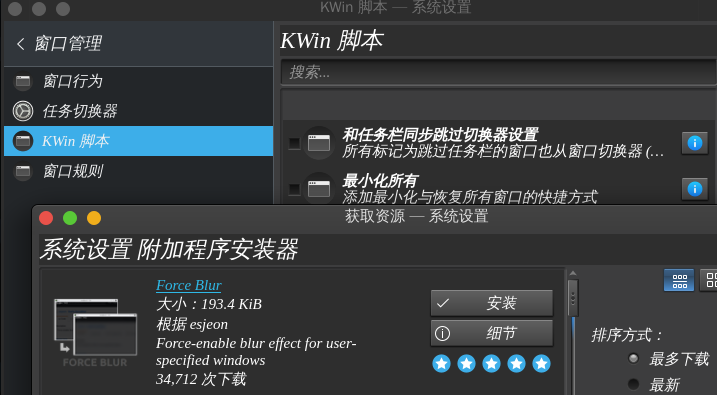
然后安装一下 KWin 脚本 Force Blur可以让窗口变得透明

image-20200901145021107

然后工作区行为-> 桌面特效

  • 外观:摆动窗口,模糊,飘落,魔灯

  • 焦点: 滑出

  • 窗口管理:桌面立方,翻转切换

然后安装 latte-dock

1
sudo pacman -S latte-dock

把桌面所有面板删除后,添加空面板,然后移动到上面

image-20200901161722983

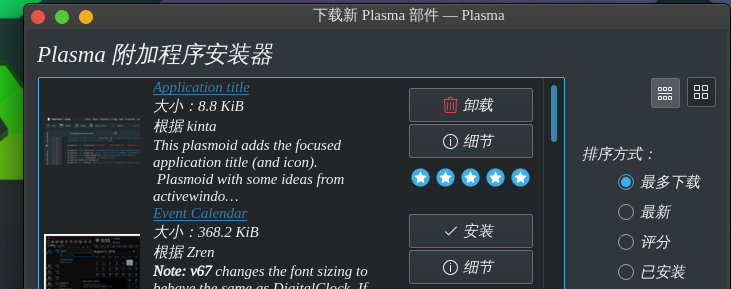
然后添加部件,需要下载一个 Application title的部件

image-20200901161809937

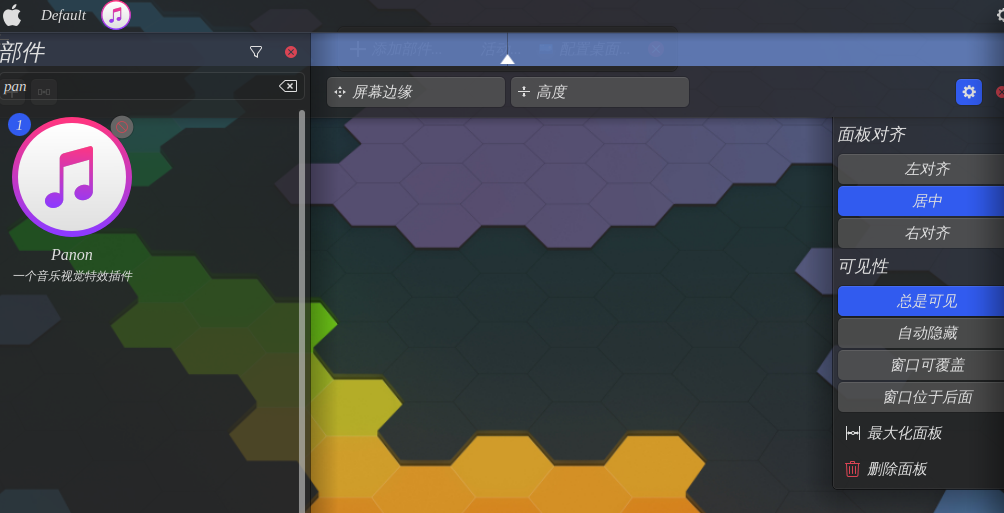
在最左边放应用程序菜单,还有Application title. 还有全局菜单。在中间放 Panon.

记得按照Panon的依赖

1
sudo pacman -S qt5-websockets python-docopt python-numpy python-pillow python-pyaudio python-cffi python-websockets

把面板对齐设置为居中

image-20200901162035116

在右边放锁定,注销。数字时钟,还有系统托盘

然后配置一下 Application title的设置,改成如下的方案。文字可以自定义
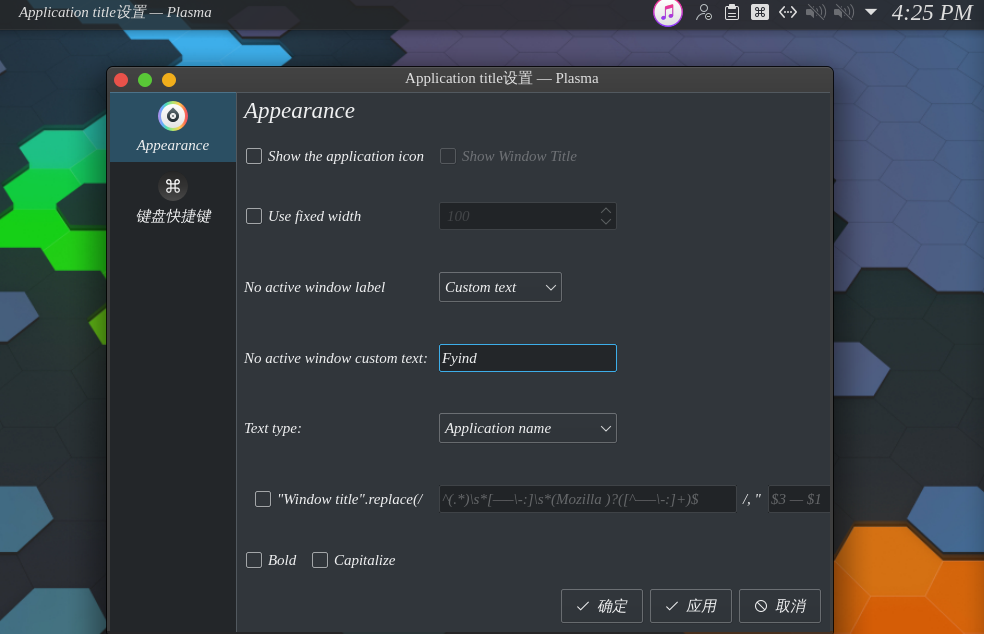
image-20200901162512134

然后搜索应用程序,打开latte-dock,然后也可以设置一下。可以左上角把应用拖拽到上面来。
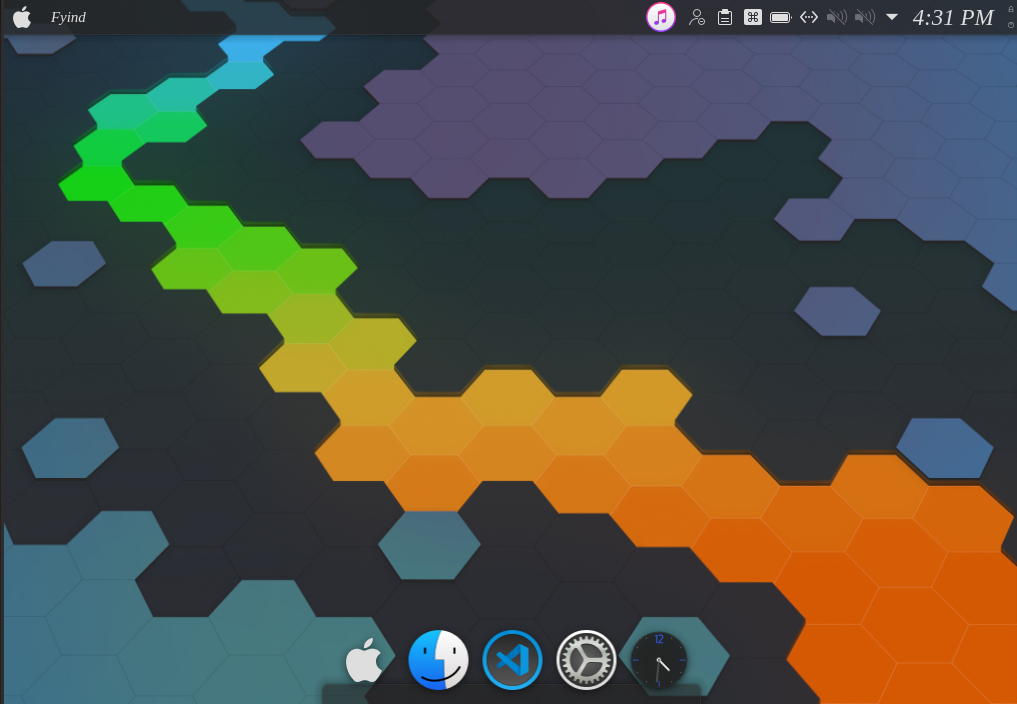
image-20200901163201244

然后邮件桌面,配置桌面。里面可以配置壁纸

然后系统设置里面,开机和关机,设置登录屏幕为 McMojave
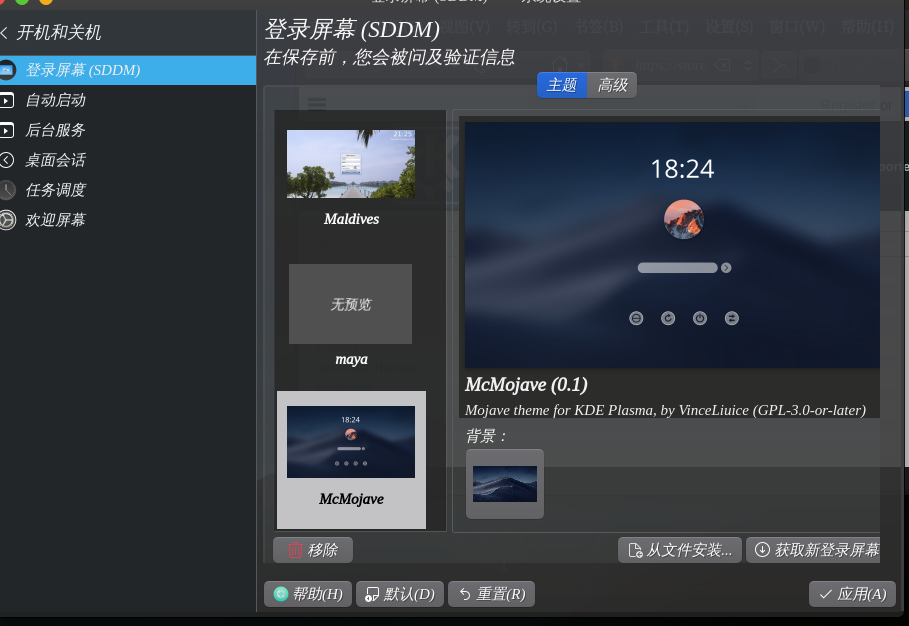
image-20200901163438768

然后把欢迎屏幕设置成无(我不太喜欢)

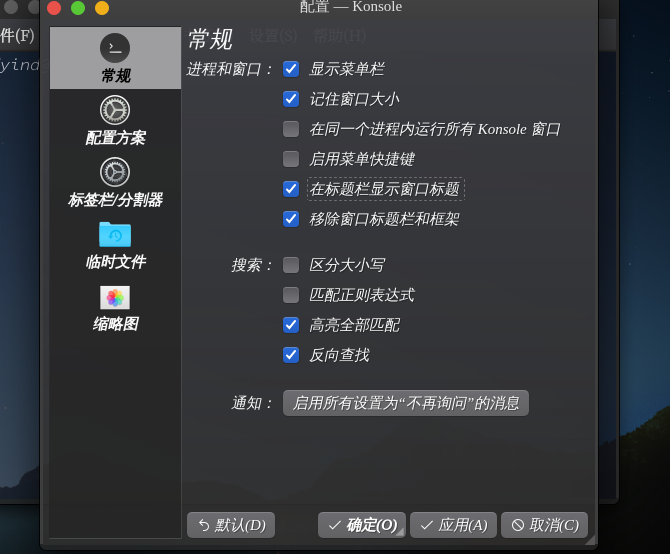
然后打开终端,配置一下。

image-20200901163858144

在配置方案里新建一个配置方案,然后在外观里面,搜索下载 Sweet KDE.
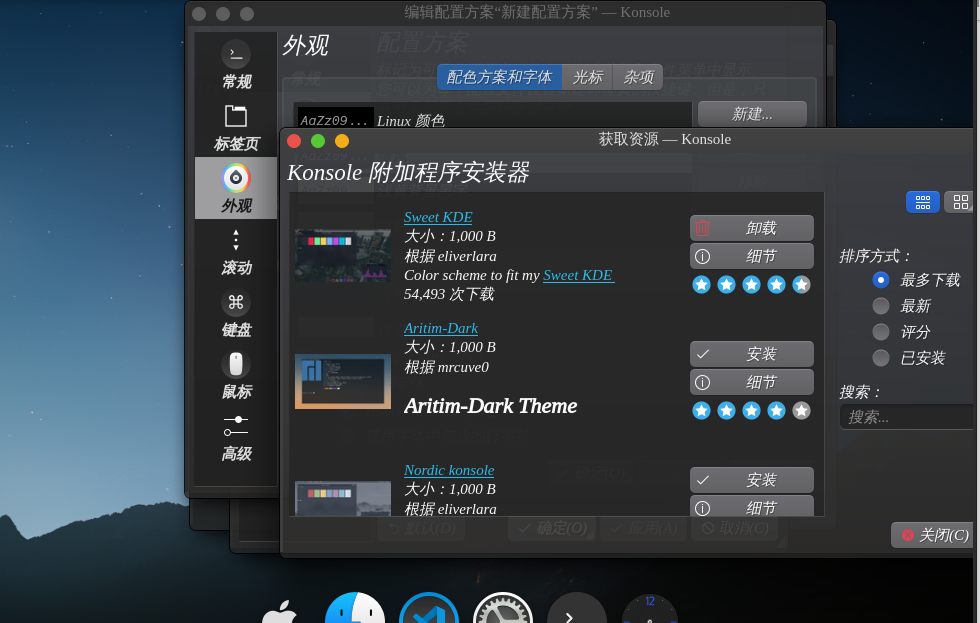
image-20200901163703827

然后字体设置成 Hasklig Light 13pt

更改图标

可以右键应用程序面板,更改自己的图标
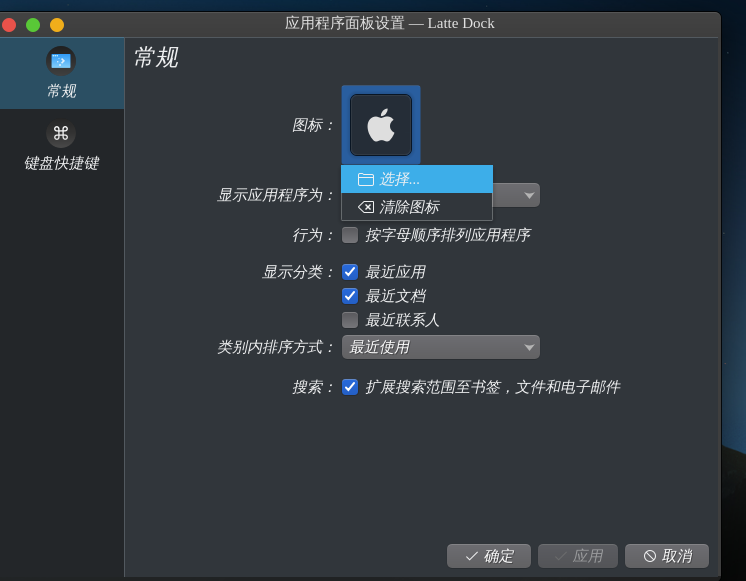
image-20200901201936059

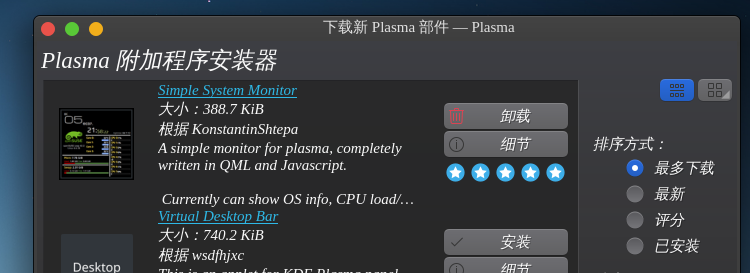
可以在小部件里面装一个 Simple System Monitor

image-20200901202155357

放在桌面上,可以把它的背景颜色改成 Crystal

image-20200901202800966

基本上配置到这里就差不多了,后面是我自己比较习惯的其他配置

快捷键

我想把终端的快捷键改成 Win + Return

可以打开系统设置,然后快捷键-> 自定义快捷键->examples 里面的 run konsole 勾选上,在里面的触发器改成 Meta+Return

同样的,如果我想配置按 Meta + C打开浏览器,可以右键examples加入一个命令/URL 然后就可以设置了

Shell 脚本

#! 可以告诉计算机用什么解释器来执行这个脚本

1
2
#!/bin/bash
echo "Hello World !"

运行

直接运行

1
2
chmod +x test.sh
./test.sh

作为参数运行

1
zsh test.sh

变量

赋值语句中间不能有空格. 输出的时候前面要加上 $

1
2
my_name="Fyind"
echo $my_name

字符串拼接

可以直接连续写

1
2
3
name="fyind"
greeting="hello"$name"!"
echo greeting

字符串长度

前面加 #

1
2
echo $#greeting
echo ${#greeting}

提取字符串

要加括号,提取第 1 到第 4 个

1
echo ${greeting:1:4}

查找字符串

查找i 或者 o的位置,从1开始计数

1
echo `expr index "$greeting" io`

shell 数组

1
2
3
4
5
array=(3 4 5 6)
array[0] = 6
echo $array[0]
echo $array[@] # 获取所有元素
echo ${#array[@]} # 获取长度

循环

下面把/etc 目录下的文件循环一遍

1
2
for file in `ls /etc`
for file in $(ls /etc)

for格式

1
2
3
4
5
6
7
for var in item1 item2 ... itemN
do
command1
command2
...
commandN
done

while

1
2
3
4
while true
do
command
done

可以用 breakcontinue

shell 传参

1
./test.sh 1 2 3

执行

1
2
3
4
echo "执行的文件名:$0";
echo "第一个参数为:$1";
echo "第二个参数为:$2";
echo "第三个参数为:$3";
特殊参数
  • $# 参数个数
  • $* 所有参数
  • $$ 脚本运行进程号
  • $? 显示最后命令退出状态,0是无错误

运算符

运算要在前面加入 expr 3+ 4 要加反引号

1
val=`expr 3 + 4`

算数运算

1
2
3
4
5
6

a=5
b=6

result=$[a+b] # 注意等号两边不能有空格
echo "result 为: $result"

判断语句

一行

1
if [ $(ps -ef | grep -c "ssh") -gt 1 ]; then echo "true"; fi

多行

1
2
3
4
5
6
7
8
9
if condition1
then
command1
elif condition2
then
command2
else
commandN
fi
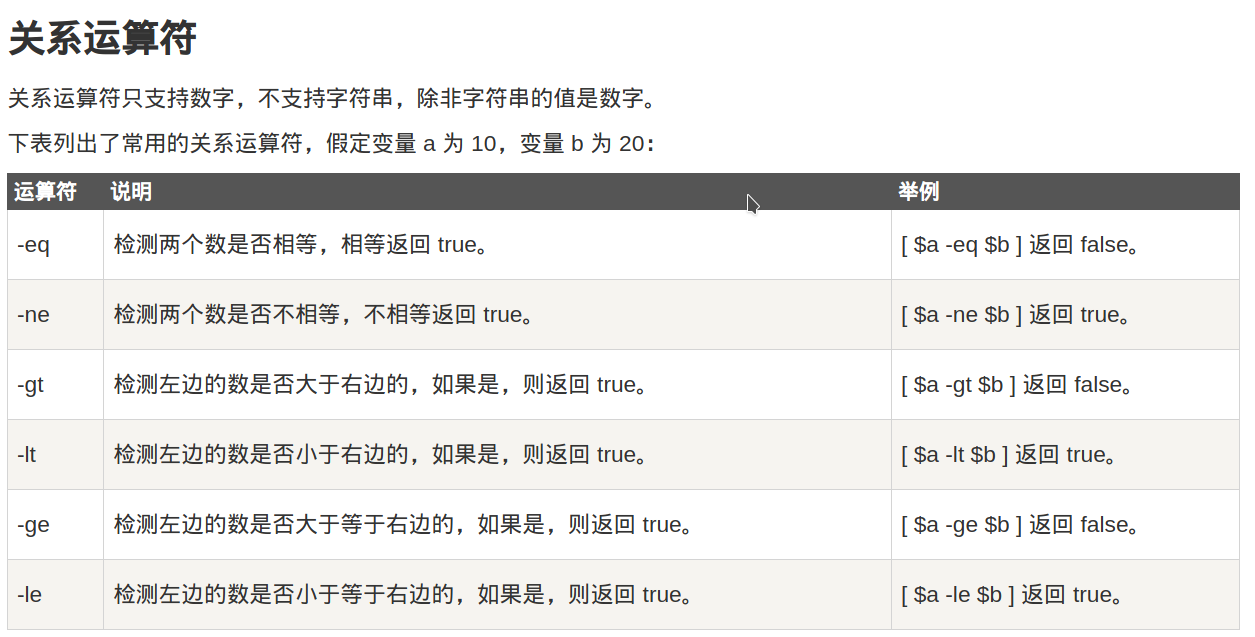
  • 关系
image-20200903102000195
  • 逻辑运算

    ! && || not and or

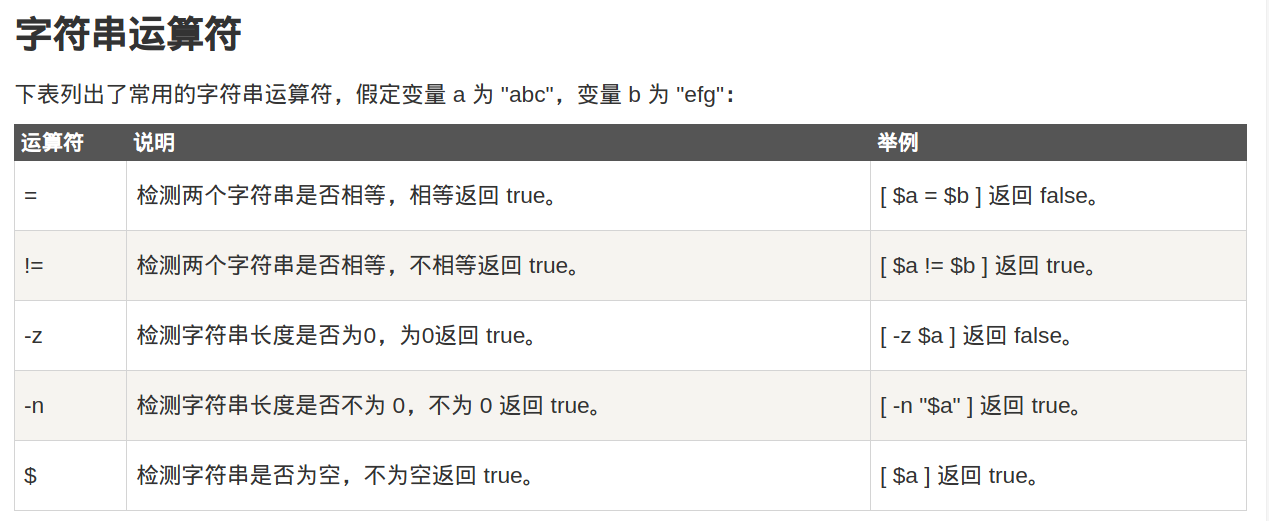
  • 字符串

image-20200903101759655
1
2
3
4
5
6
7
8
9
10
11
12
13
14
15
16
17
18
19
20
21
22
23
if [ $a == $b ]
then
echo "a 等于 b"
fi
if [ $a != $b ]
then
echo "a 不等于 b"
fi


if [ $a = $b ]
then
echo "$a = $b : 字符串a 等于 字符串b"
else
echo "$a = $b: 字符串a 不等于 字符串b"
fi

if [ -z $a ]
then
echo "-z $a : 字符串长度为 0"
else
echo "-z $a : 字符串长度不为 0"
fi
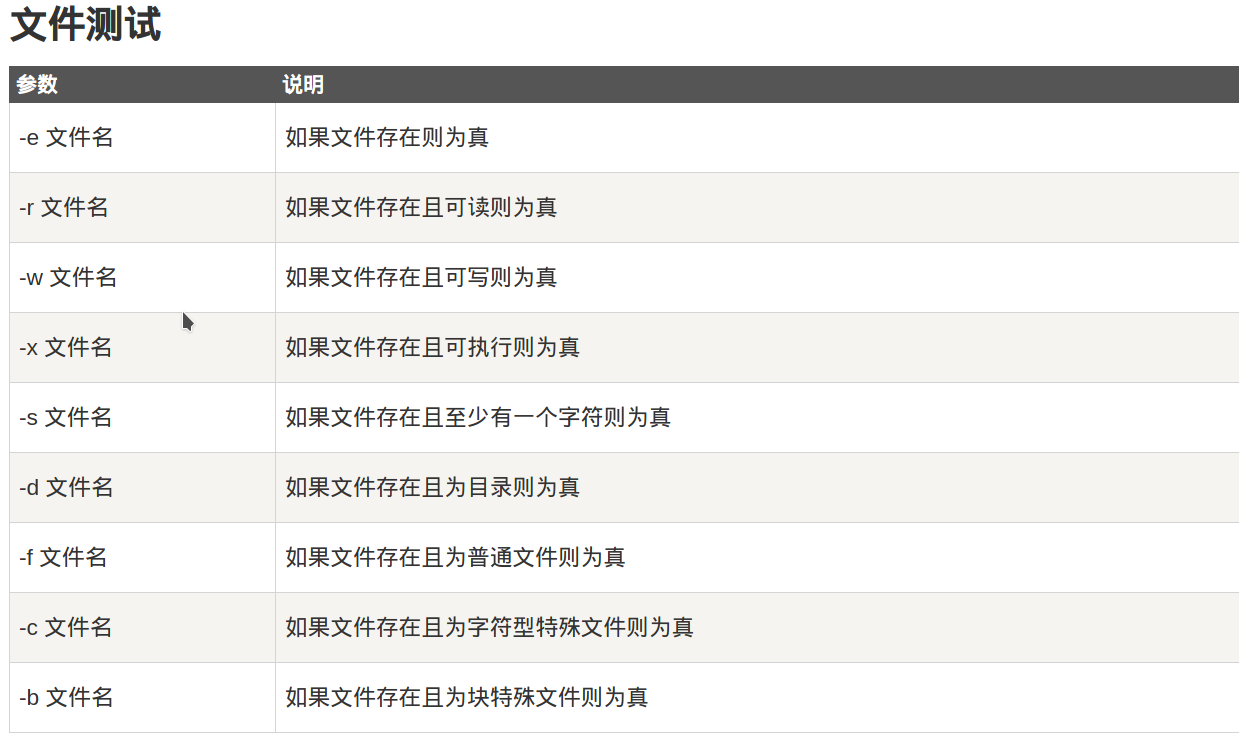
  • 文件测试
image-20200903102542888

echo输出

重定向

1
echo "str" > myfile

>> 是追加 < 是输入重定向

如果不希望输出,可以执行

1
command > /dev/null 2>&1

合并输入文件 n <& m 合并输出文件 n >& m

显示命令执行结果

1
echo `date`

printf

1
printf " %d %s\n" 1 abc

函数

返回值要用 $? 来获取

1
2
3
4
5
6
7
8
9
10
11
funWithReturn(){
echo "这个函数会对输入的两个数字进行相加运算..."
echo "输入第一个数字: "
read aNum
echo "输入第二个数字: "
read anotherNum
echo "两个数字分别为 $aNum 和 $anotherNum !"
return $(($aNum+$anotherNum))
}
funWithReturn
echo "输入的两个数字之和为 $? !"

引用其它文件

1
source filename

ZSH 配置和使用

取别名

~/.zshrc 里面写

1
alias vim="nvim"

VIM 的配置

COC补全

1
2
3
4
sudo pacman -S nodejs npm
sudo npm i -g neovim yarn
sudo pacman -S python-pip
pip install -U jedi-language-server

vimrcplug板块里面加入

1
Plug 'neoclide/coc.nvim', {'branch': 'release'}

然后 :PlugInstall 就可以把 COC 安装上了.

安装COC扩展

在Vim里面

1
2
3
:CocInstall coc-json # 安装coc-json 插件
:CocUninstall coc-json # 删除拓展
:CocList extensions

在CocList 中按 Tab 可以做其他操作

如果想统一管理扩展,让vim 启动就自动按照可以在vimrc里面定义一个全局变量

1
let g:coc_global_extensions = ['coc-json', 'coc-vimlsp']

我目前的配置文件

1
2
3
4
5
6
7
8
9
10
11
12
13
14
15
16
17
18
19
20
21
22
23
24
25
26
27
28
29
30
31
32
33
34
35
36
37
38
39
40
41
42
43
44
45
46
47
48
49
50
51
52
53
54
55
56
57
58
59
60
61
62
63
64
65
66
67
68


" TextEdit might fail if hidden is not set.
set hidden

set updatetime=100
set shortmess+=c

inoremap <silent><expr> <TAB>
\ pumvisible() ? "\<C-n>" :
\ <SID>check_back_space() ? "\<TAB>" :
\ coc#refresh()
inoremap <expr><S-TAB> pumvisible() ? "\<C-p>" : "\<C-h>"

function! s:check_back_space() abort
let col = col('.') - 1
return !col || getline('.')[col - 1] =~# '\s'
endfunction

inoremap <silent><expr> <c-space> coc#refresh()

inoremap <expr> <cr> complete_info()["selected"] != "-1" ? "\<C-y>" : "\<C-g>u\<CR>"
nmap <silent> [g <Plug>(coc-diagnostic-prev)
nmap <silent> ]g <Plug>(coc-diagnostic-next)

" GoTo code navigation.
nmap <silent> gd <Plug>(coc-definition)
nmap <silent> gy <Plug>(coc-type-definition)
nmap <silent> gi <Plug>(coc-implementation)
nmap <silent> gr <Plug>(coc-references)
nnoremap <silent> K :call <SID>show_documentation()<CR>
autocmd CursorHold * silent call CocActionAsync('highlight')
nmap <leader>rn <Plug>(coc-rename)
xmap <leader>a <Plug>(coc-codeaction-selected)
nmap <leader>a <Plug>(coc-codeaction-selected)
xmap if <Plug>(coc-funcobj-i)
omap if <Plug>(coc-funcobj-i)
xmap af <Plug>(coc-funcobj-a)
omap af <Plug>(coc-funcobj-a)
xmap ic <Plug>(coc-classobj-i)
omap ic <Plug>(coc-classobj-i)
xmap ac <Plug>(coc-classobj-a)
omap ac <Plug>(coc-classobj-a)

function! SetupCommandAbbrs(from, to)
exec 'cnoreabbrev <expr> '.a:from
\ .' ((getcmdtype() ==# ":" && getcmdline() ==# "'.a:from.'")'
\ .'? ("'.a:to.'") : ("'.a:from.'"))'
endfunction

" Use C to open coc config
call SetupCommandAbbrs('C', 'CocConfig')

" Use <C-l> for trigger snippet expand.
imap <C-l> <Plug>(coc-snippets-expand)

" Use <C-j> for select text for visual placeholder of snippet.
vmap <C-j> <Plug>(coc-snippets-select)

" Use <C-j> for jump to next placeholder, it's default of coc.nvim
let g:coc_snippet_next = '<c-j>'

" Use <C-k> for jump to previous placeholder, it's default of coc.nvim
let g:coc_snippet_prev = '<c-k>'

" Use <C-j> for both expand and jump (make expand higher priority.)
imap <C-j> <Plug>(coc-snippets-expand-jump)

自动补全的使用

  • 补全, 切换补全 Tab
  • 打开补全 Ctrl + o
  • 取消补全,上一个补全 Shift + Tab
  • 确定当前补全 Return
  • 跳转到函数的定义 gd
  • 跳转到实现 gi
  • 显示文档 K

coc-snippets

在vim配置文件里

1
2
3
4
5
6
7
8
9
10
11
12
13
14
15
16
17
18
19
20
21
22
23
24
25
26
27
" Use <C-l> for trigger snippet expand.
imap <C-l> <Plug>(coc-snippets-expand)

" Use <C-j> for select text for visual placeholder of snippet.
vmap <C-j> <Plug>(coc-snippets-select)

" Use <C-j> for jump to next placeholder, it's default of coc.nvim
let g:coc_snippet_next = '<c-j>'

" Use <C-k> for jump to previous placeholder, it's default of coc.nvim
let g:coc_snippet_prev = '<c-k>'

" Use <C-j> for both expand and jump (make expand higher priority.)
imap <C-j> <Plug>(coc-snippets-expand-jump)

inoremap <silent><expr> <TAB>
\ pumvisible() ? coc#_select_confirm() :
\ coc#expandableOrJumpable() ? "\<C-r>=coc#rpc#request('doKeymap', ['snippets-expand-jump',''])\<CR>" :
\ <SID>check_back_space() ? "\<TAB>" :
\ coc#refresh()

function! s:check_back_space() abort
let col = col('.') - 1
return !col || getline('.')[col - 1] =~# '\s'
endfunction

let g:coc_snippet_next = '<tab>'

与系统剪贴板互通

1
sudo pacman -S xsel

然后在配置文件里加入

1
set clipboard+=unnamedplus

即可

更改配色方案

可以在这个网站上找到很多配色方案 https://vimcolors.com/

比如 monokai-pro 方案

首先安装2个插件

1
2
Plug 'sheerun/vim-ployglot'
Plug 'phanviet/vim-monokai-pro'

然后在vimrc加入

1
2
3
4
5
6
" monokai pro
set termguicolors
colorscheme monokai_pro
let g:lightline = {
\ 'colorscheme': 'monokai_pro',
\ }

NerdCommenter

在vimrc 中加入

1
2
3
4
5
6
7
8
9
10
11
12
13
14
15
16
17
18
19
20
21
22
23
24
filetype plugin on
" Add spaces after comment delimiters by default
let g:NERDSpaceDelims = 1

" Use compact syntax for prettified multi-line comments
let g:NERDCompactSexyComs = 1

" Align line-wise comment delimiters flush left instead of following code indentation
let g:NERDDefaultAlign = 'left'

" Set a language to use its alternate delimiters by default
let g:NERDAltDelims_java = 1

" Add your own custom formats or override the defaults
let g:NERDCustomDelimiters = { 'c': { 'left': '/**','right': '*/' } }

" Allow commenting and inverting empty lines (useful when commenting a region)
let g:NERDCommentEmptyLines = 1

" Enable trimming of trailing whitespace when uncommenting
let g:NERDTrimTrailingWhitespace = 1

" Enable NERDCommenterToggle to check all selected lines is commented or not
let g:NERDToggleCheckAllLines = 1

使用

  • 注释 leader + cc
  • 反注释 leader + cu
  • 最小化注释 leader + cm
  • 模块化注释 leader + cs
  • 切换注释符 leader + ca
  • 注释并复制 leade + cy

QuickRun

自动编译运行代码

我的vimrc

1
2
3
4
5
6
7
8
9
10
11
12
13
"
" quickrun
"

let g:quickrun_config = {
\ "_" : {
\ "outputter" : "message",
\ },
\}

let g:quickrun_no_default_key_mappings = 1
nmap <Leader>r :QuickRun -input "d.txt"<CR>
nmap <A-r> :QuickRun<CR>

使用

  • 带输入d.txt运行 leader + r
  • 不带输入 Alt + r

NerdTree

1
map <C-n> :NERDTreeToggle<CR>

插入模式移动

按Alt + hjkl

1
2
3
4
imap <m-h> <Left>
imap <m-l> <Right>
imap <m-j> <Down>
imap <m-k> <Up>